
Table of Contents
When using AWS you may incur unexpected charges due to various reasons. For example, you can make a mistake while calculating the cost of a particular service, or a mistake when setting up the service, or when your app gets unexpectedly large amount of traffic, etc.
So, if you use AWS for a real project or just for experimenting with the services, it's a great idea to set up a billing alarm to get notified when your AWS charges exceed a certain threshold. This allows you to examine the costs of the services you use and take them under control before the charges grow too large, especially if the exceeding charges are due to a mistake you made while setting up the services.
Enabling the Billing Alerts Option
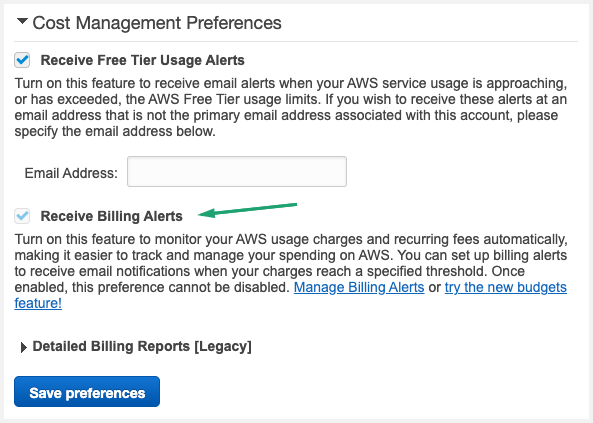
To create a billing alarm you have to enable the billing alerts option. With billing alerts enabled you'll be able to monitor your AWS usage charges and recurring fees. Basically, this enables billing data collection in your account, you'll be able to see your AWS charges statistics on the Billing dashboard in CloudWatch. Important: if you enable the billing alerts option, you cannot disable it.
To enable the billing alerts option and to be able to create billing alarms you have to login using your root account's credentials or as an IAM user with permission to view billing information.
To enable the billing alerts option:
-
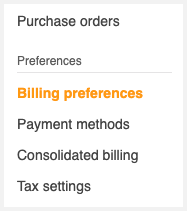
In the menu, click Billing Preferences
-
Check Receive Billing Alerts (once you enable this option, you won't be able to disable it)
-
Click Save Preferences
Creating Billing Alarms
-
Open the CloudWatch console and switch to the US East (N. Virginia) (us-east-1) region. At the moment (November, 2020) CloudWatch displays the billing data only in this region.
-
In the menu, click Alarms
-
Click Create alarm
-
Click Select metric
-
In the All metrics tab click Billing and choose Total Estimated Charge
-
Check the row with the metric name EstimatedCharges

-
Click Select metric
-
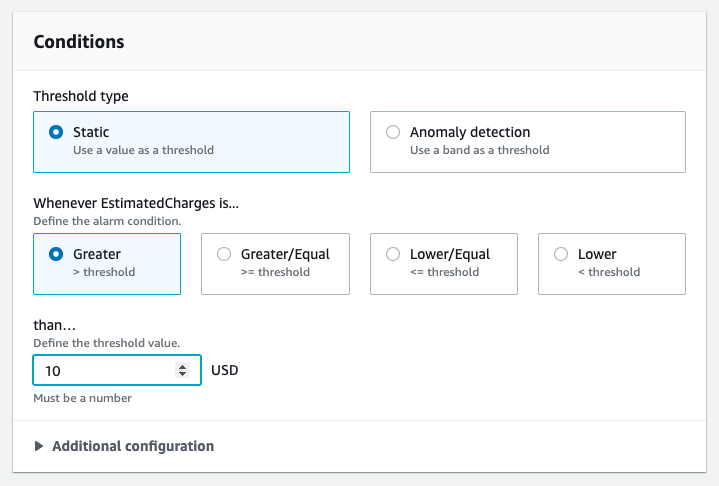
Under Conditions, select Static for the Threshold type and Greater for the Whenever EstimatedCharges is... option
-
For than... enter the monthly amount (e.g., 10). When your monthly charges become greater than this amount, the alarm will go off (go into ALARM state)
-
Click Next
-
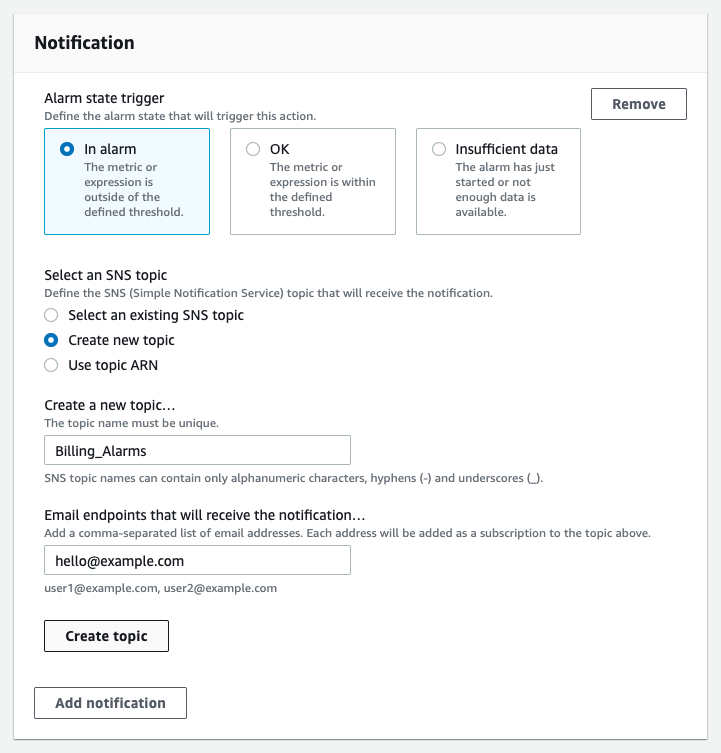
Under Notification, for Alarm state trigger select In alarm
-
Select the SNS (Simple Notification Service) topic that is gonna get the notification. You can either use an existing topic or create a new one. If you're setting up a billing alarm for the first time you most probably will need to create a new topic. So, select Create new topic. You'll need to enter the topic name and the email addresses that will receive the notification.
-
If you created a new topic, SNS should have sent the Subscription Confirmation email to the email addresses that you've added to the topic. You need to click the Confirm subscription link in that email to confirm that you allow SNS to send you notification emails regarding that topic. The owners of other email addresses you specified should do the same. If you don't confirm the subscription, you won't receive the Alarm notifications.
-
Click Next
-
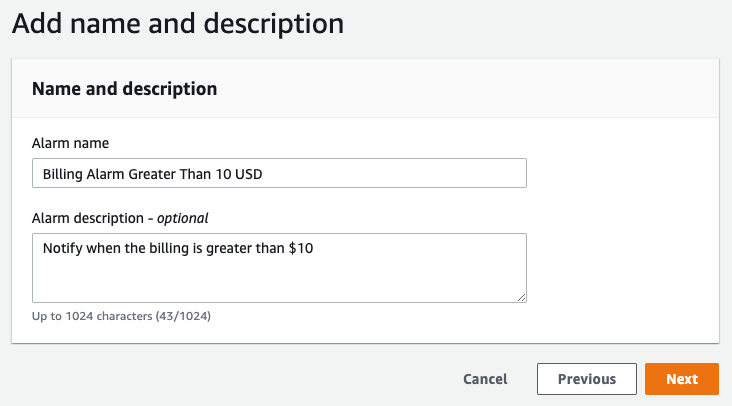
Enter the alarm's name (e.g., "Billing Greater Than 10 USD") and description.
-
Click Next
-
Review the alarm options and if everything is correct, click Create alarm
It takes some time for the alarm to get initialized. If the current monthly charges are greater than the alarm's threshold, the alarm should go off once it is initialized.
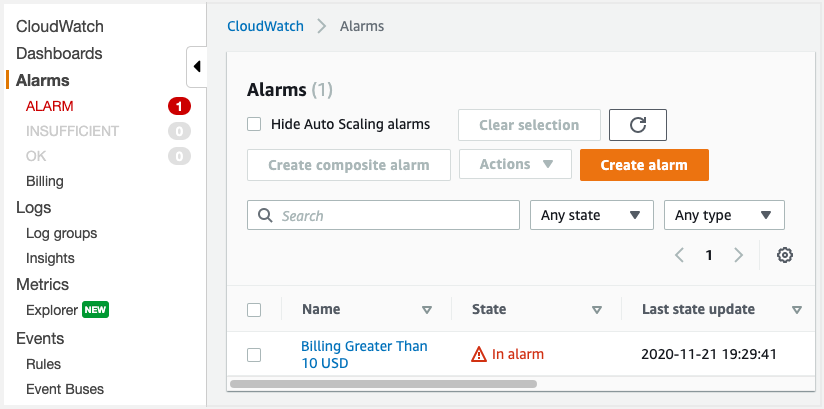
Please note that the billing metrics are updated every six hours. CloudWatch will be able to check your spending only every six hours and this means that you most probably will not get the notification immediately at the point when your spending reaches the alarm's threshold.
Also, I want to mention that you can create multiple billing alarms.
AWS Budgets
Another way to monitor your AWS account's spending and to set up notifications for when the charges go over a given threshold, is to use the AWS Budgets feature (Billing & Cost Management Dashboard -> Budgets). I'm planning to talk about creating a cost budget in another blog post.

Useful Resources
Creating a Billing Alarm to Monitor Your Estimated AWS Charges